
HubSpot and Salesforce are two of the leading customer relationship management (CRM) software systems, and they're proven to help marketing and sales teams build data-driven strategies to drive and close qualified leads. When used together, the individual power of these tools is combined to create a solution designed to benefit your business.
Questions to Consider Before You Start Your Integration
If you think you are ready to dive into setting up your HubSpot-Salesforce integration, ask yourself these questions before getting started.
1. Do you know what your sales path looks like?
Understanding the entire process a contact goes through–from the first point of conversion on the website to the final closing sales call and all the steps in between–is important for setting up the perfect integration. Understanding this process will make it easier to set up customer workflows and make it clear which properties and objects you want to sync between HubSpot and Salesforce.
2. Do you want ALL contacts to sync?
If you want all of your contacts to sync between HubSpot and Salesforce, you can continue with the standard integration set up. If not, you may need to consider the selective sync set up. Selective sync allows you to set up guidelines and criteria so that only the contacts and other properties you desire are synced between HubSpot and Salesforce. This requires a more complicated set up.
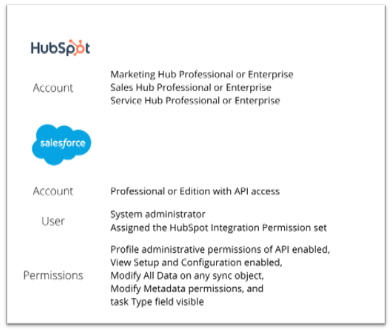
3. Do you have the proper subscription, access, and permissions to install the integration?
In order to install the HubSpot-Salesforce integration, you must ensure you have the appropriate subscriptions, access, and permissions from both HubSpot and Salesforce.
4. Do you have enough API calls?
The integration can only make a limited number of API calls per day. A single contact can make up to four API calls per record, and this number can vary. Always note how many API calls are available before syncing between HubSpot and Salesforce. A general rule of thumb to follow is to multiply the number of contacts being imported by the number of associated properties/fields; this is how many API calls the import will likely use. If the number used is higher than the number available, the import will pause and resume the next day when the limit is refreshed. Your specific API call limit can vary between 1,000-1,000,000 depending on your subscription type and number of licenses.
If you are confident in your answers to the above questions, you are ready to set up your HubSpot-Salesforce integration!
Note: If multiple HubSpot accounts are to be connected to one Salesforce instance, each HubSpot account will need the integration installed.
How to Install the HubSpot-Salesforce Integration
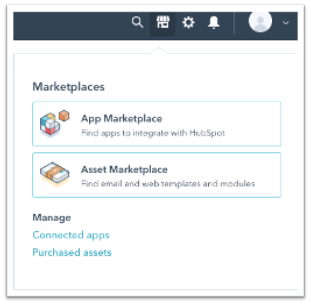
1. Navigate to the Marketplace from the navigation menu in HubSpot. Under the Marketplaces section, click into the App Marketplace.
2. Using the search bar, type in “Salesforce” to find the Salesforce integration. Click to view the integration and connect it.
3. Click Request to connect to get started with the integration.
4. The connector wizard will open. If connecting to a Salesforce sandbox, select the Yes, this will connect to a sandbox checkbox.
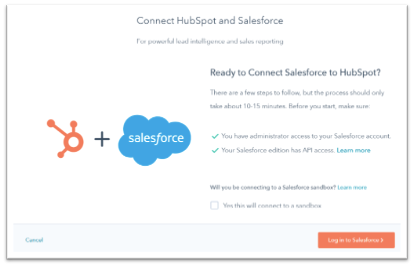
5. Click the Log in to Salesforce button to continue.
6. Enter your Salesforce credentials and click Log in. Once successfully logged in, Salesforce will redirect you back to the HubSpot connector wizard.
7. The next step is to install HubSpot in Salesforce. Click the Start the Salesforce package installation to begin link.
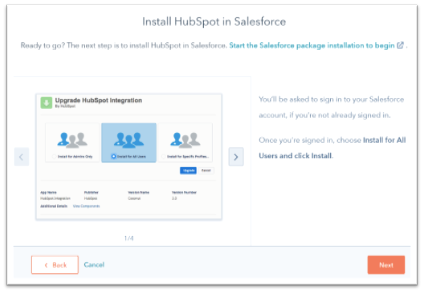
8. HubSpot will redirect back to Salesforce to install the HubSpot integration package. Within Salesforce, select Install for All Users and click Install.
9. Select the Yes, grant access to these third-party web sites checkbox within the dialog box and click Continue.
10. Salesforce will install the HubSpot integration package, which may take up to ten minutes. Salesforce will send an email when the integration is complete, so you can click Done and wait for the next step after installation.
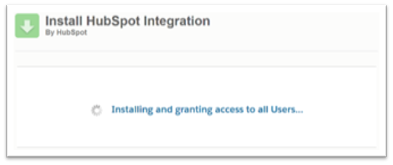
11. Once the package completes installation, you can navigate back to the HubSpot connector wizard. Click Next to continue to the next step.
12. Add the HubSpot Visualforce module to Salesforce. This module displays a contact’s likelihood of closing and gives the user access to view and filter the contact’s activity. The module also enables contacts to be enrolled in HubSpot workflows. Click Add HubSpot to Salesforce to install the module.
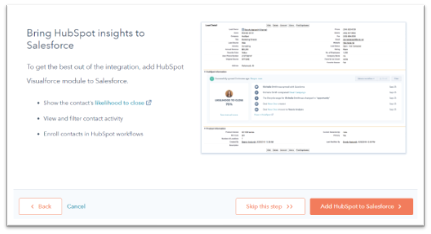
13. The connector wizard will display step-by-step instructions to add the HubSpot Visualforce module to Salesforce. Follow the instructions by using the arrows, then click Next once completed.
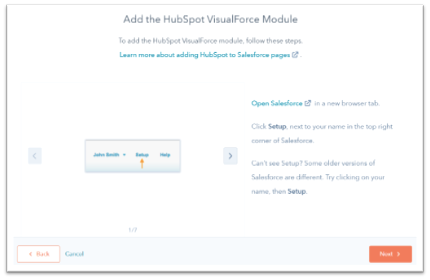
14. The next step is to select how data will sync between HubSpot and Salesforce.
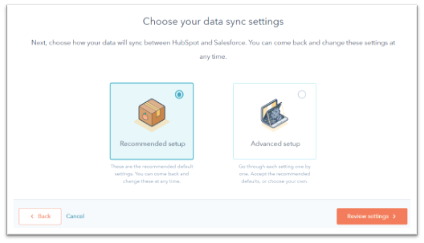
- If you select Recommended setup, you can continue by clicking Review settings.
- If you select Advanced setup, click Next to continue.
- On the following screen, use the dropdown menu Choose which contacts to sync to select one of the following:
All contacts: which will sync all contacts to Salesforce
HubSpot list: which will use an inclusion list to sync specific contacts to Salesforce
ii. Click Next to set up activity and task sync settings.
To automatically create a task in HubSpot when a task is created in Salesforce, toggle on the Salesforce task sync switch.
In the Timeline sync table, select the Sync checkbox next to HubSpot events to have them sync to Salesforce as tasks.
Use the Salesforce task type dropdown menu to select the type of task you want created in Salesforce.
Once finished, click Next.
iii. On the final screen, you will set up the object and property sync settings.
Click on the Contacts, Companies, or Deals tab to configure sync types with standard properties for each object. For the Companies and Deals tabs, you will first need to toggle on the Enable company/deal sync switch. This will allow you to create the field mappings.
In the table, you will see the standard HubSpot object properties and their Salesforce field equivalents. For each property sync, select your preferred type of sync from the following:
-
-
- Prefer Salesforce (Default)
- Always use Salesforce
- Two-way
Once you have selected a sync type for each property, click Next to continue.
-
15. Lastly, review all of the selected data sync settings. If you wish to alter any settings, click Change to make your edits. When you have completed reviewing and editing, click Finish setup and begin syncing to complete the setup.
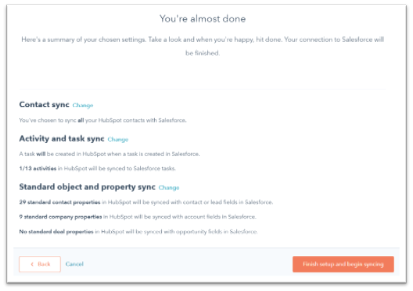
16. The connector wizard will redirect you to the Salesforce integration settings as the data between HubSpot and Salesforce syncs.
Now that your standard integration is set, look for our update on how you can achieve sales and marketing alignment by utilizing the HubSpot and Salesforce integrated features. For more tips and information about digital marketing tools, subscribe to our blog!


